


Bucket filling helps kids learn how to be more positive towards others. The following activities help kids learn how to be bucket fillers, which in turn creates a positive classroom environment.
Bucket Filling Concept
I’ve come across this concepts at most schools I’ve taught at. You can learn more about bucket filling by reading the books or checking out the official site here.
Basically, we can pretend that we’re all walking around with an invisible bucket. When people are kind to us, for example by giving us a compliment, they fill our bucket up. When we have full buckets we feel good. On the other hand, if people are unkind, for example by saying something mean, they dip from our bucket. If our bucket keeps getting dipped then we feel bad. No one wants that empty bucket feeling! We can also learn to put a lid on our bucket, to protect our bucket and prevent any bucket dipping. That at least, is my understanding of bucket filling. Be sure to read the books to get the precise concept! :)
Bucket Filler Activities
In my class, I introduce bucket filling to my students by first reading the books. After that we do a range of hands-on bucket filling activities.
Create a Bucket Filler Bulletin Board
I usually get the kids to decorate a small paper cup or popcorn container with googly eyes and a marker (to create a face). You can add a chenille stick for the handle.
Then we place the buckets on a bulletin board with the banner “In our classroom, we are bucket fillers”. I print out a number of bucket filling slips so that teaching staff can write bucket filling notes for each student’s buckets. If you have older students, they could write bucket filling notes too. Then at the end of the term the kids can take their full buckets home. :)
Bucket Filling Clip Cards
These clip cards help kids identify what actions fill other people’s buckets or dip from their buckets.
Preparation – Print and laminate the cards for added durability. Then grab a basket of pegs (clothes pins).
How to Play – Choose a card and look at the action. Think about whether that action would fill someones bucket or dip from it. Then place a peg on the answer.
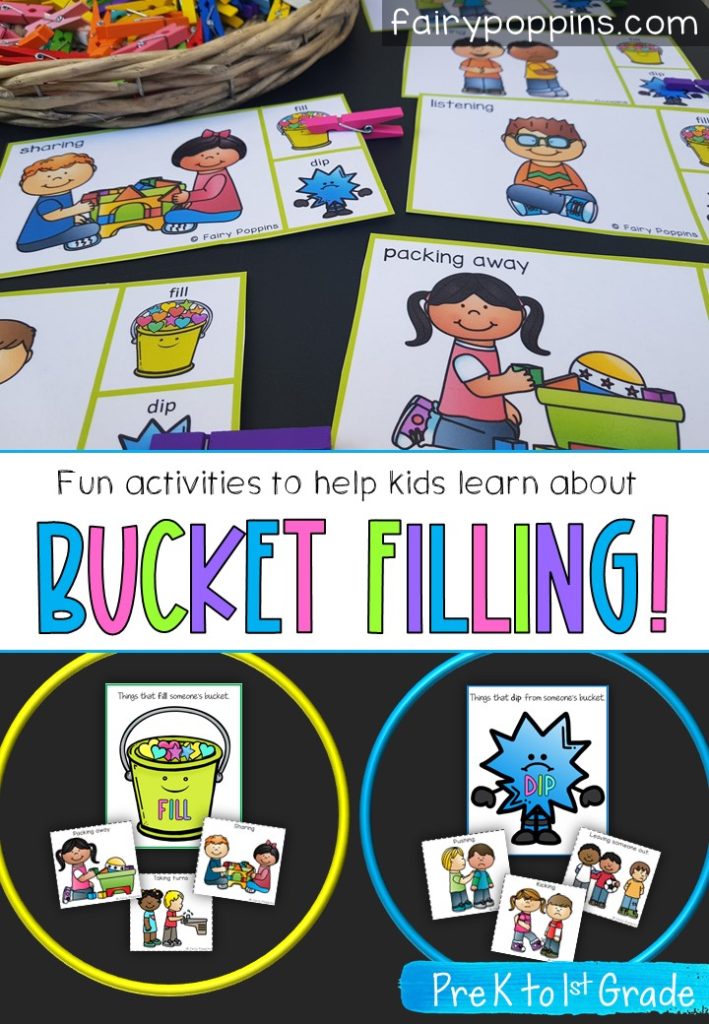
Bucket Filling Sort and Classify Game
This activity is fun to do as a group activity. I often get the kids to sit in a circle on the mat and place two hoola hoops in the center of the circle with the headings “fill” and “dip”.
Preparation – Print and laminate the sorting cards for added durability. Other useful resources include hoola hoops and a container to put the cards in (e.g. box or hat).
How to Play – Take turns choosing a card from the container. Name the action and discuss whether it would help to fill someone’s bucket or dip from it. Then place the card near the corresponding heading. Continue playing until all of the cards have been sorted.
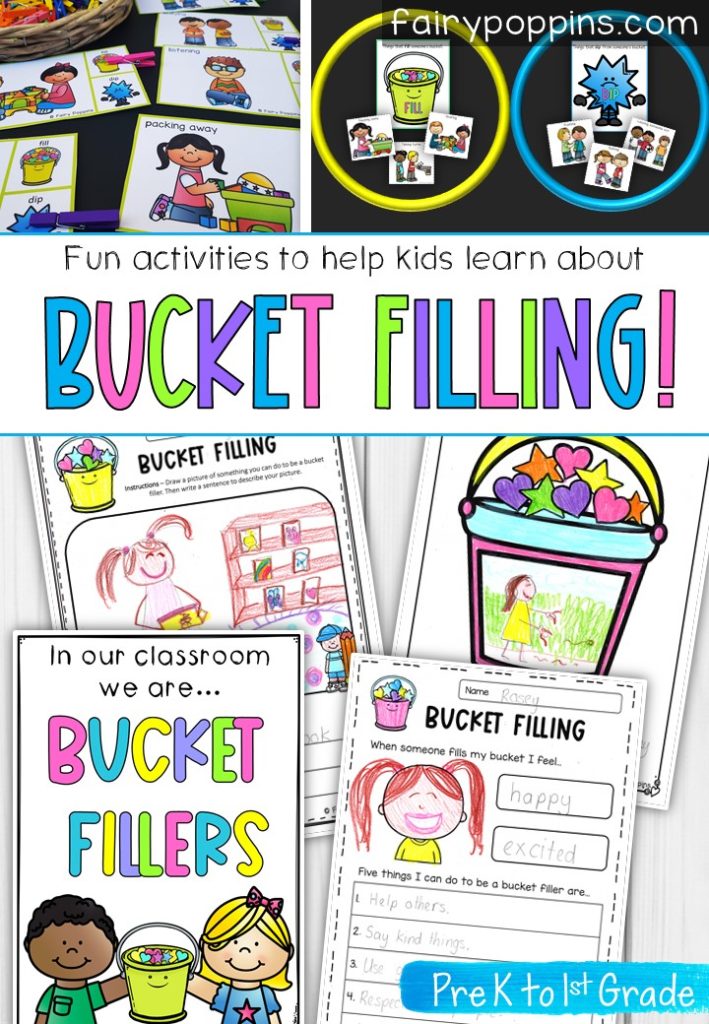
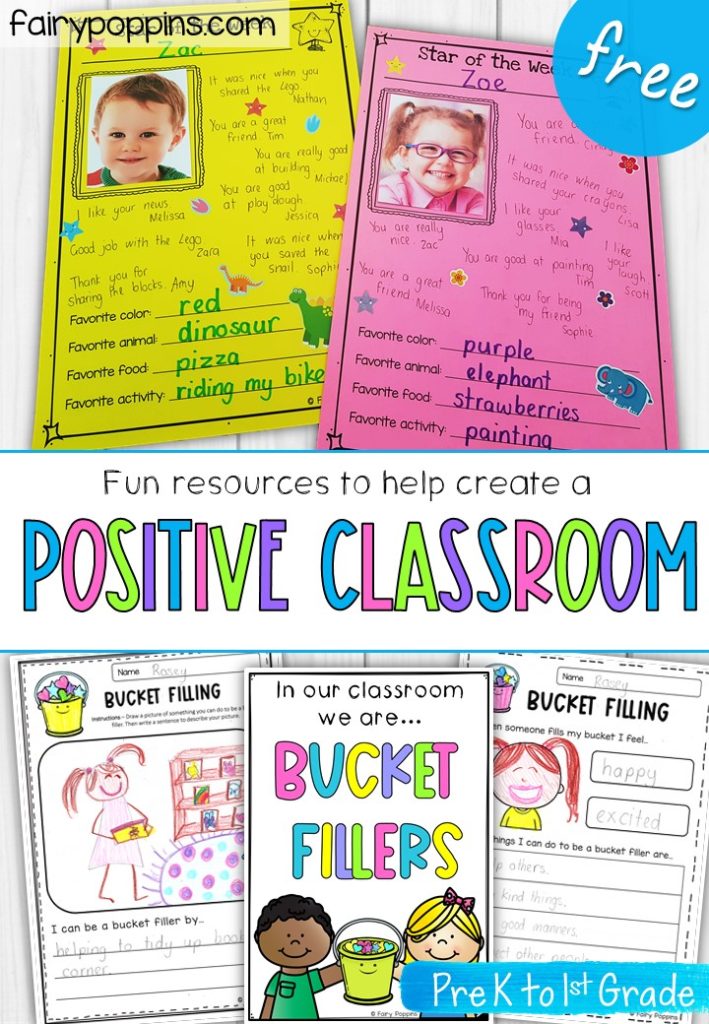
Bucket Filler Worksheet Activities
I created a range of simple worksheets to help kids apply their understanding of bucket filling and bucket dipping. One of my favorite activities is to create a class book. So the kids each draw a picture of something they do to be a bucket filler and write a short sentence about it. Once they’ve done that, I assemble the pages into a display folder so that we can read it.
You can check out all of the bucket filler activities I use here or by clicking on the picture below. They include worksheets, clip cards, sort and classify cards, posters, banners, certificates and bucket filling slips.

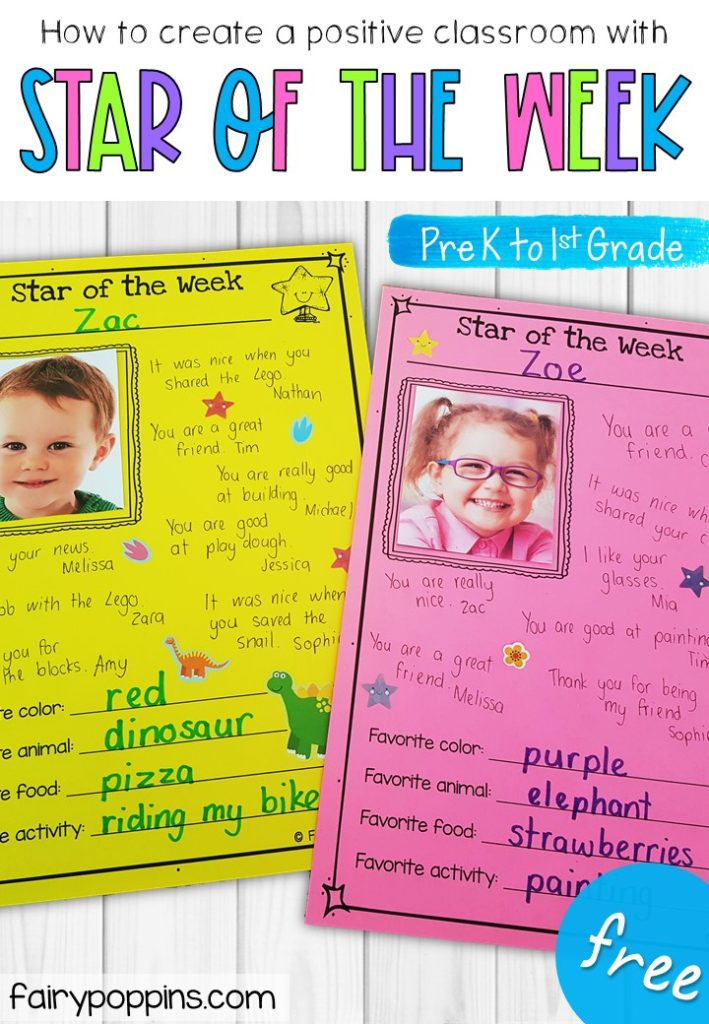
Star of the Week
Another activity I love doing when teaching kids about bucket filling, is to introduce a “Star of the Week” to our class routine. This is basically picking a student or two to be a “Star of the Week” so we can learn more about them and focus on things we like about them. This activity is great for an “About Me” classroom theme too.
Preparation – Print one of the templates you like – there’s an American and Australian spelling version. I usually print them on A3 colored card stock and then laminate them once they’re completed. You’ll also need a small photo of the student to paste in the box.
How to Play – I begin by teaching the kids about how to give a compliment. We also talk about how giving compliments helps to fill other people’s buckets.
Next I choose a “Star of the Week”, write the student’s name and paste a photo of them in the box. Next, I use the compliments reference poster to prompt some of their peers to give a compliment about that student. Then I write the compliments in the blank space. If you choose the template with the questions, ask the “Star of the Week” to answer these and write the answers in too.
Once the “Star of the Week” is complete you can introduce the student to the class and celebrate all the wonderful things about them. Kids usually get very excited about this activity!
Grab your free “Star of the Week” resources below.


I hope you find these activities helpful.
Happy teaching! :)